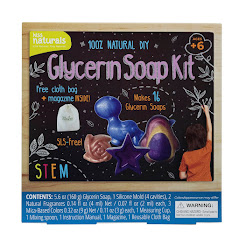
Instructions for making soaps from Glycerin Soap Kit
Did you realize you can make unique kinds of soaps from a solitary DIY Glycerin Soap Kit? Without SLS, non-harmful, no parabens, no manufactured colours, and no synthetic mixtures! Simply unadulterated, very common ingredient. Make bubbly hand soaps. Browse fun shapes like bear, heart, star, blossom, butterfly, dinosaur and more! Contains supporting oils like olive oil and coconut oil, leaving your skin plush! Silicon form can be reused again and again!

Extraordinary movement for young
women and young men and everybody in the middle of ages 6 and up in Canada. Not
for kids under 3 years of age! Makes an extraordinary DIY project for kid toys
and yourself or a present for loved ones! Ideal for kids birthday celebrations,
sleepovers, a self-consideration spa day, science tests, stormy days, travel or
only a pleasant family action! This unit contains all that you have to make
unadulterated, sans SLS glycerin soaps!
Directions for making soap
1. Shower the inside of
the plastic moulds with a modest quantity of cooking splash. Make a point to
cover all zones. If you utilize a lot of showers, wipe away the abundance with
a paper towel. Similarly, on the off chance that you are utilizing oil jam,
utilize sufficiently only to delicately cover the form.
2.
Liquefy littler
measures of soap; you can generally include more. Have your kid place cube(s)
of soap in the estimating cup. Put the cup in the microwave and set too high
for 30 seconds. If some strong soap remains, microwave in 10-second spans until
it is softened, however not bubbling.
3.
Eliminate the
liquefied soap from the microwave. This ought to be finished by a grown-up or
more established kid since the soap will be exceptionally hot!
4. Have your kid include
a drop or two of the fluid soap colour to the liquefied soap. A lot of colours
will make your soap dim. Mix colours to get the ideal shade. At that point,
request that your kid mix the colour into the soap utilizing a chopstick or
Popsicle stick.
5.
Cautiously empty the
hot soap into the moulds about 33% of the path to the top. Let the soap cool
for around 20 minutes, at that point have your kid place a plastic creature or
knickknack on the head of the solidified soap.
6. Rehash stages 2 and 3
to soften and shading the rest of the soap. Pour the second layer of soap into
the shape, covering the plastic creature or knickknack. Allow it to cool and
solidify for in any event 2 hours. When it’s cool, flip around the form and pop
the soap out. Utilize boiling water to clean the moulds.
7. Discretionary: If your kid might want a layered, rainbow look, empty limited quantities into the moulds and let them solidify before including another shading layer. He can likewise add perfume to the soaps with a drop or two of fundamental oils, or normal components like poppy seeds or citrus strips.

Comments
Post a Comment